Useful git commands

checkoutgit checkout -f <branch_name>
checkingit add <file>.
git commit -m <commit_message>
create branch git checkout -b <branch_name>
pushgit push origin <branch_name>
pullgit pull origin <branch_name>
Create Tagsgit tag -a <tag_name> -m <message>
git push –tags
Checkout Taggit checkout -f <new_branch_name> <tag_name>
reset to remotegit reset –hard origin/master.

Android ACTION_VIEW to open pdf/images in an external application

Open URI (image or pdf) in external app

    private void shareURI(Uri uri) {
        try {
            Intent shareIntent = new Intent();
            shareIntent.setAction(Intent.ACTION_VIEW);
            shareIntent.addFlags(Intent.FLAG_GRANT_PERSISTABLE_URI_PERMISSION | Intent.FLAG_GRANT_READ_URI_PERMISSION);

            String lastPathSegment = uri.getLastPathSegment();
            String fileExt = MimeTypeMap.getFileExtensionFromUrl(lastPathSegment);

            Activity activity = getActivity();

            String mimeType = null;
            if (fileExt.equalsIgnoreCase("jpg") == true ||
                    fileExt.equalsIgnoreCase("png") == true ||
                    fileExt.equalsIgnoreCase("gif") == true ||
                    fileExt.equalsIgnoreCase("jpeg") == true
            ) {
                mimeType = "image/*";
            } else if (fileExt.equalsIgnoreCase("pdf") == true) {
                mimeType = "application/pdf";
            } else {
                mimeType = "*/*";
            }

            shareIntent.setDataAndType(uri, mimeType);

            try {
                activity.startActivity(Intent.createChooser(shareIntent, "Open with"));
            } catch (ActivityNotFoundException e) {
                Toast.makeText(activity, "Failed to open", Toast.LENGTH_SHORT).show();
            }

        } catch (Exception ex) {
            ex.printStackTrace();
        }
    }

Exception in thread “main” java.lang.UnsupportedClassVersionError: org/elasticsearch/plugins/PluginCli : Unsupported major.minor version 52.0

The aws ec2-instance has older version has Java 1.7. The latest version of the elastic-search requires Java 1.8. If you try to install the plugin like x-pack now, you will get this error:

[ec2-user@ip-10-0-20-199 bin]$ sudo ./elasticsearch-plugin install x-pack[ec2-user@ip-10-0-20-199 bin]$ sudo ./elasticsearch-plugin install x-packException in thread “main” java.lang.UnsupportedClassVersionError: org/elasticsearch/plugins/PluginCli : Unsupported major.minor version 52.0 at java.lang.ClassLoader.defineClass1(Native Method) at java.lang.ClassLoader.defineClass(ClassLoader.java:803) at java.security.SecureClassLoader.defineClass(SecureClassLoader.java:142) at java.net.URLClassLoader.defineClass(URLClassLoader.java:442) at java.net.URLClassLoader.access$100(URLClassLoader.java:64) at java.net.URLClassLoader$1.run(URLClassLoader.java:354) at java.net.URLClassLoader$1.run(URLClassLoader.java:348) at java.security.AccessController.doPrivileged(Native Method) at java.net.URLClassLoader.findClass(URLClassLoader.java:347) at java.lang.ClassLoader.loadClass(ClassLoader.java:425) at sun.misc.Launcher$AppClassLoader.loadClass(Launcher.java:312) at java.lang.ClassLoader.loadClass(ClassLoader.java:358) at sun.launcher.LauncherHelper.checkAndLoadMain(LauncherHelper.java:482)[ec2-user@ip-10-0-20-199 bin]$ packet_write_wait: Connection to 35.154.108.46 port 22: Broken pipe

The fix is simple, update the Java version to 1.8.

This how we do it on aws ec2 instance:

[ec2-user@ip-10-0-20-199 ~]$ sudo yum install java-1.8.0
[ec2-user@ip-10-0-20-199 ~]$ sudo /usr/sbin/alternatives –config java
[ec2-user@ip-10-0-20-199 ~]$ sudo /usr/sbin/alternatives –config java

There are 2 programs which provide ‘java’.

Selection Command
———————————————–
*+ 1 /usr/lib/jvm/jre-1.7.0-openjdk.x86_64/bin/java
2 /usr/lib/jvm/jre-1.8.0-openjdk.x86_64/bin/java

Enter to keep the current selection[+], or type selection number: 2


ERROR: Failed to build gem native extension

I was trying to install ruby gem for nats, and I got this error:

[ec2-user@ip-xx-xx-xx-xx nats]$ sudo gem install nats
Building native extensions. This could take a while…
ERROR: Error installing nats:
ERROR: Failed to build gem native extension.

current directory: /usr/local/share/ruby/gems/2.0/gems/eventmachine-1.2.3/ext
/usr/bin/ruby2.0 -r ./siteconf20170630-22515-1601fpy.rb extconf.rb
mkmf.rb can’t find header files for ruby at /usr/share/ruby/include/ruby.h

extconf failed, exit code 1

Gem files will remain installed in /usr/local/share/ruby/gems/2.0/gems/eventmachine-1.2.3 for inspection.
Results logged to /usr/local/lib64/ruby/gems/2.0/gems/eventmachine-1.2.3/gem_make.out

To fix this, run this command:
sudo yum -y install ruby-devel gcc

Quick tip on MySQL dump

Terminal command to dump MySQL data: 
mysqldump -u -p > /path/to/sqldump/db_database.sql

eg: mysqldump -uroot -padmin123 db_sports > /home/ec2-user/db_sports.sql

Import sql dump:
mysql -u -p < /path/of/sqldump/db_database.sql

ex: mysql -uroot -padmin123 db_sports < /home/ec2-user/db_sports.sql

AWS S3 permissions

A quick tip on aws S3 permissions to a specific folder in a bucket.

{
"Version": "2012-10-17",
"Statement": [{
"Effect": "Allow",
"Action": [
"s3:Put*",
"s3:Get*",
"s3:List*"
],
"Resource": [
"arn:aws:s3:::nameofmybucket/profile/*"
]
}]
}

Try to avoid bucket root level permission as much as possible. Also, try to use cognito if the client wants to directly access aws resources.

Validating digits session on server side to build secure apps

Digits is a  service from twitter which helps you onboard your mobile app users with simple phone number authentication and it’s for free 🙂

If you have a mobile app that onboard the user using digits service and you want to validate the session generated by digits on your server side then this blog is for you.

The app communicates with the server using REST APIs. Send the token and secret generated by the twitter to the server using the REST API. Twitter provides verify credentials API to validate the sessions generated by Digits at the server side.

Dive into the server side component developed using node.js
Fill in all the details related to digits.
var token = "";
var token_secret = "";
var consumer_key = "";
var consumer_secret = "";
var oauth =
{
consumer_key: consumer_key
, consumer_secret: consumer_secret
, token: token
, token_secret: token_secret
};

Make the verify_credentials API call to validate the session information.
function callback(error, response, body) {
if (!error && response.statusCode == 200) {
console.log("success");
} else {
console.log("error: ", error);
}
}
var request = require('request');
var url = "https://api.twitter.com/1.1/account/verify_credentials.json";
request.get({ url: url, oauth: oauth }, callback);

Note: I have used request package to make the HTTP requests from the server.

Monitoring Memory Utilisation of aws EC2 instance in CloudWatch

Connect to your EC2 instance using ssh.
ssh -i ec2-user@my_ec2_ip_address

Install following perl packages
sudo yum install -y perl-Switch perl-DateTime perl-Sys-Syslog perl-LWP-Protocol-https

Download the monitoring scripts
curl http://aws-cloudwatch.s3.amazonaws.com/downloads/CloudWatchMonitoringScripts-1.2.1.zip -O

Install the monitoring scripts
unzip CloudWatchMonitoringScripts-1.2.1.zip
rm CloudWatchMonitoringScripts-1.2.1.zip
cd aws-scripts-mon

run the following command to check the memory utilisation.
./mon-get-instance-stats.pl --recent-hours=12

In order to push this data periodically to cloud watch, we need to create an IAM user with relevant permissions, then schedule a cron job to periodically push the data to aws cloud watch.

Create a new IAM user and provide him access to the ec2 instance and cloud watch. Make a note of the aws credentials i.e. access key and secret key. You need this later. Make sure the IAM user has following access.

cloudwatch:PutMetricData
cloudwatch:GetMetricStatistics
cloudwatch:ListMetrics
ec2:DescribeTags

For the purpose of the demo, you can provide full access to EC2 and CloudWatch (This is not recommended for production.)

run the following command
cp awscreds.template awscreds.con

open the file  awscreds.conf and enter the key & secret.
The content of the file should look something like this

AWSAccessKeyId=AKAWSACESSKEYSA
AWSSecretKey=z/NOAWSSECRETkeyzt

Run the following command to push the data to cloud watch
./mon-put-instance-data.pl --mem-util --mem-used --mem-avail

Now, configure the cron tab to automate this process at eveny 5 minutes interval.
crontab -e
*/5 * * * * ~/aws-scripts-mon/mon-put-instance-data.pl --mem-util --disk-space-util --disk-path=/ --from-cron

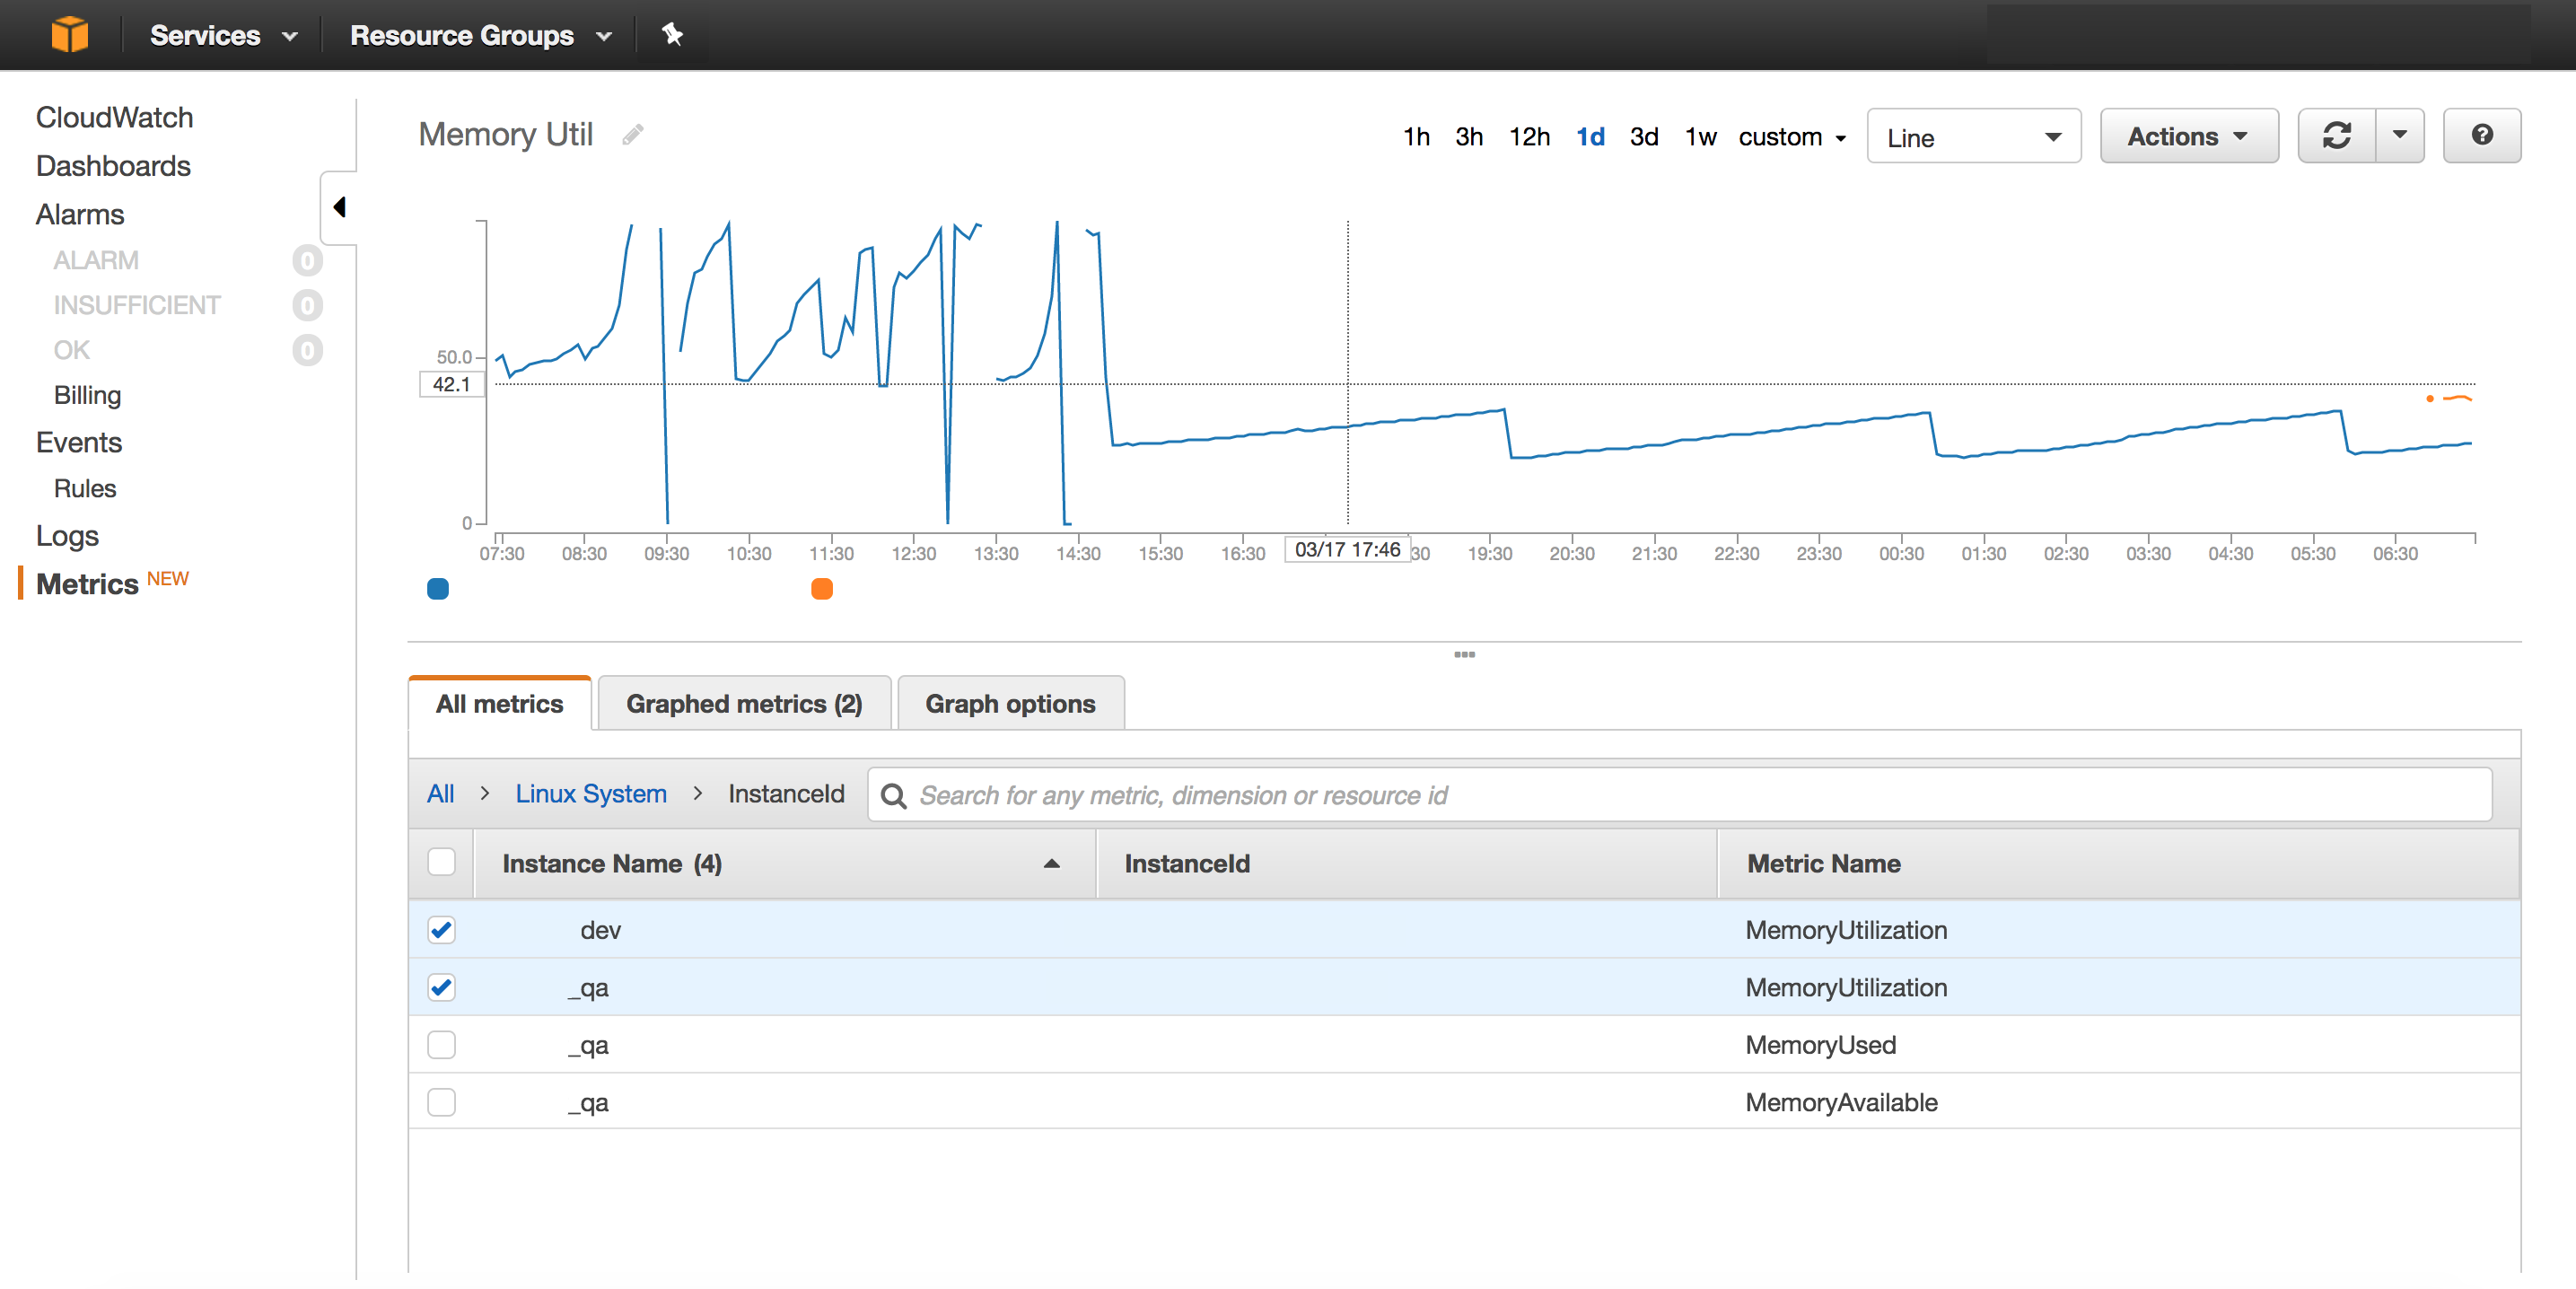
In your aws console, go to cloud watch section, and select Metrics => custom namespaces => Linux System. Select the required metrics.

aws_cloud_watch_memory.png


Detailed documnetation from aws can be found here

Installing node.js on amazon EC2 instance

Launch an EC2 instance of type Amazon Linux AMI from your aws console.

SSH into your ec2 instance
ssh -i ec2-user@my_ec2_ip_address

Update the instance
sudo yum update -y

#install developer tools
sudo yum groupinstall -y "Development Tools"

Install the node using nvm as it allows you to switch between any version of the node 🙂
curl -o- https://raw.githubusercontent.com/creationix/nvm/v0.32.0/install.sh | bash
. ~/.nvm/nvm.sh
nvm install 4.4.5
node -e "console.log('Running Node.js ' + process.version)"

Install pm2
npm install pm2 -g --save

pull the source code in ec2 instance. run your node app using pm2
pm2 start app.js --name="api"

Setting git on aws EC2 instance

Launch an EC2 instance of type Amazon Linux AMI from your aws console.

SSH into your ec2 instance
ssh -i ec2-user@my_ec2_ip_address

Update the instance
sudo yum update -y

install developer tools
sudo yum groupinstall -y "Development Tools"

install git
sudo yum install git

checkout the source code
git clone https://my.git.repo.git
cd my_local_git_folder
git checkout -f branch_to_checkout